
How To Create a Realistic Money Effect in Corel Draw
[fusion_builder_container hundred_percent=”no” equal_height_columns=”no” menu_anchor=”” hide_on_mobile=”small-visibility,medium-visibility,large-visibility” class=”” id=”” background_color=”” background_image=”” background_position=”center center” background_repeat=”no-repeat” fade=”no” background_parallax=”none” parallax_speed=”0.3″ video_mp4=”” video_webm=”” video_ogv=”” video_url=”” video_aspect_ratio=”16:9″ video_loop=”yes” video_mute=”yes” overlay_color=”” video_preview_image=”” border_size=”” border_color=”” border_style=”solid” padding_top=”” padding_bottom=”” padding_left=”” padding_right=””][fusion_builder_row][fusion_builder_column type=”1_1″ layout=”1_1″ background_position=”left top” background_color=”” border_size=”” border_color=”” border_style=”solid” border_position=”all” spacing=”yes” background_image=”” background_repeat=”no-repeat” padding_top=”” padding_right=”” padding_bottom=”” padding_left=”” margin_top=”0px” margin_bottom=”0px” class=”” id=”” animation_type=”” animation_speed=”0.3″ animation_direction=”left” hide_on_mobile=”small-visibility,medium-visibility,large-visibility” center_content=”no” last=”no” min_height=”” hover_type=”none” link=””][fusion_text columns=”” column_min_width=”” column_spacing=”” rule_style=”default” rule_size=”” rule_color=”” hide_on_mobile=”small-visibility,medium-visibility,large-visibility” class=”” id=”” animation_type=”” animation_direction=”left” animation_speed=”0.3″ animation_offset=””]
[/fusion_text][fusion_text columns=”” column_min_width=”” column_spacing=”” rule_style=”default” rule_size=”” rule_color=”” hide_on_mobile=”small-visibility,medium-visibility,large-visibility” class=”” id=”” animation_type=”” animation_direction=”left” animation_speed=”0.3″ animation_offset=””]
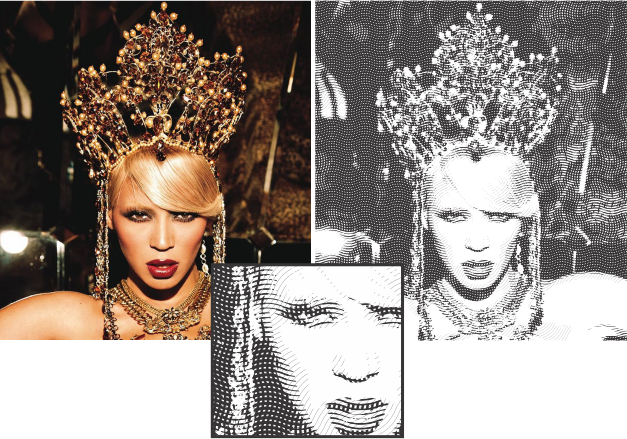
The classic illustration style used on money is something I’ve always wanted to figure out how to replicate in Corel Draw. There’s plenty of Photoshop tutorials that show how to create this effect, but this tutorial will produce a 100% vector scaleable image.
Software Note: CorelDRAW X6 was used in this tutorial.
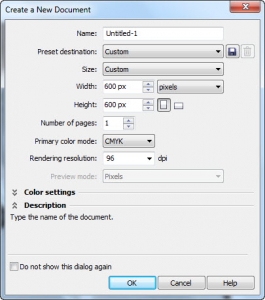
Step 1 – Create New File
Here’s the settings I used to create my file. Depending on your computer you can go larger or smaller but I’ve had pretty good luck with these settings.
Step 2 – Find a Subject Matter
For this tutorial I chose a picture of my son Andrew. I’ve supplied the actual photo for you to use freely. AndrewPic
Step 3 – Insert picture into your work space.
Step 4 – Crop picture to the size you want it to be.
I like to just draw a box around the area I want to use with the rectangle tool. Then using the Pick tool select the box first, then hold down the shift key and select the picture. Then you will want to select the intersect button I have pointed out in this picture. Once clipped you will have 3 objects. The original photo and the rectangle which you can delete and the newly cropped picture.

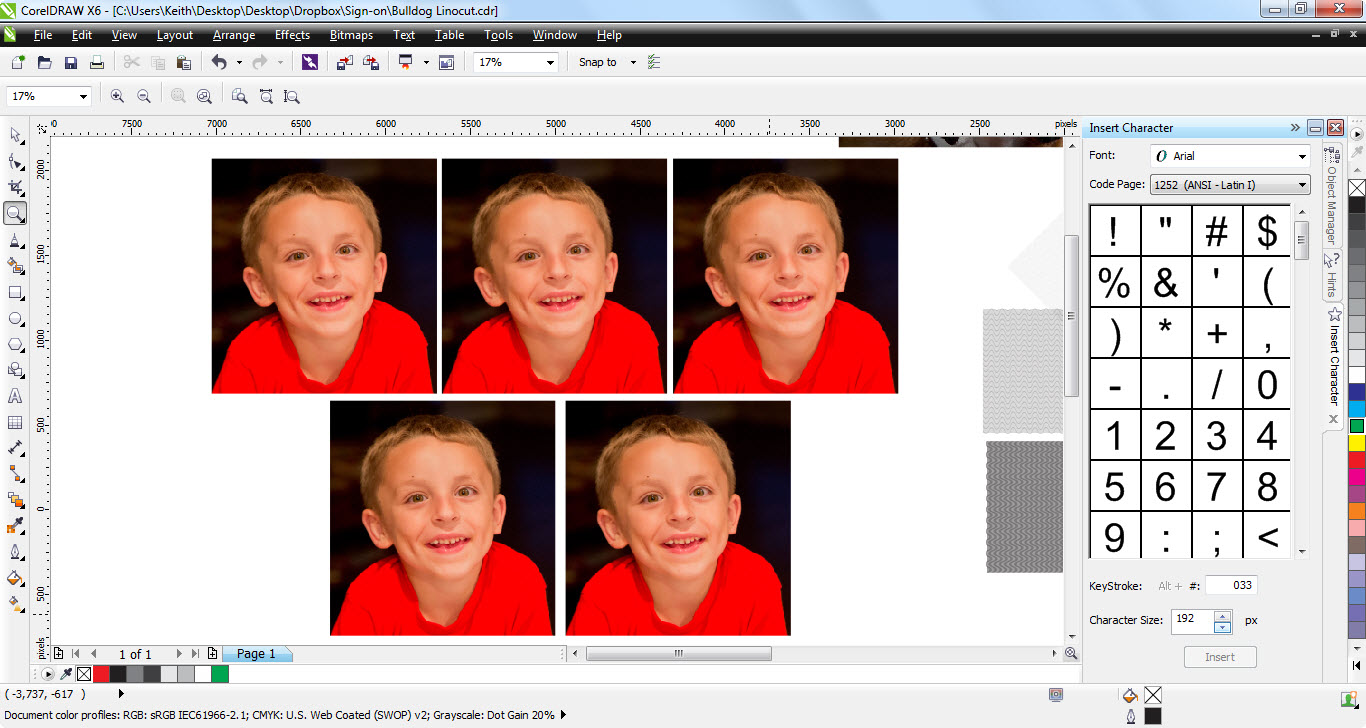
Step 5 – Make 5 Duplicate Copies of Picture.
I like to just select my image with the pick tool, then while holding down the control key (to keep the image in line with the duplicate) drag to the right and when you are far enough over just right click with your mouse and it creates a duplicate. If this sounds too complicated copy and paste works just fine also.
Step 6 – Adjust Pictures to Create Depth Layers
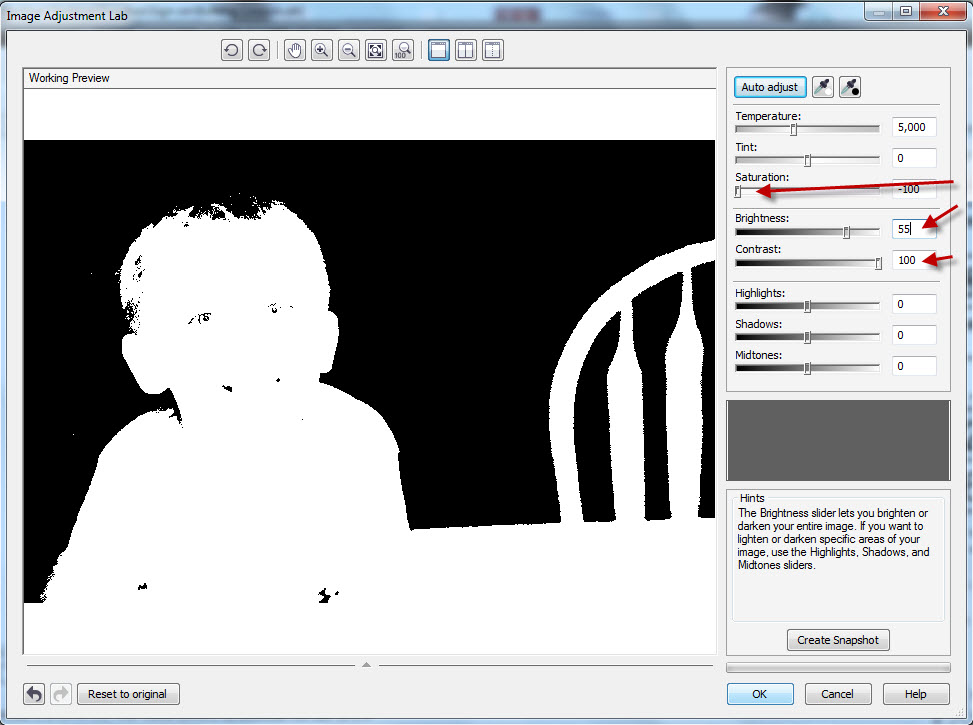
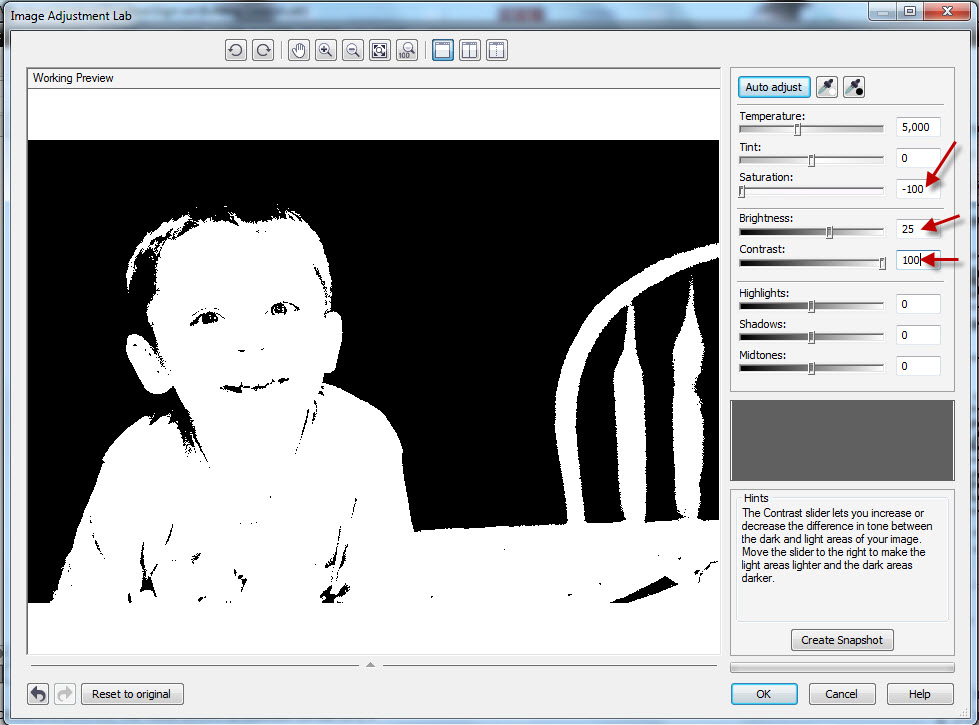
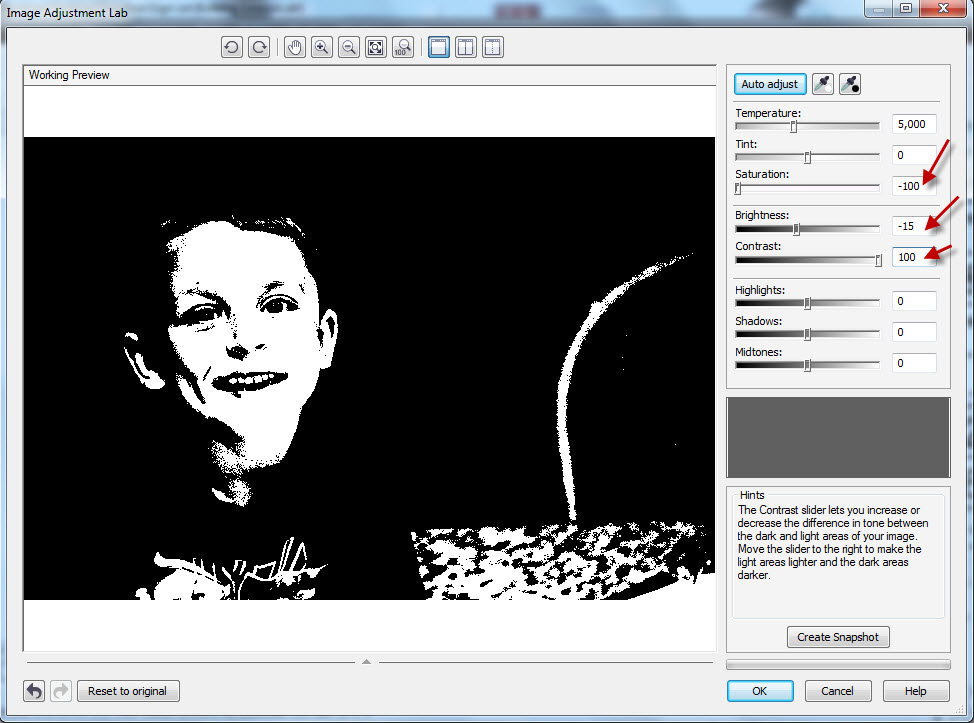
Select your first image and then click on “Bitmap” and “Image Adjustment Lab”
You will get a screen with sliders, adjust your sliders as shown in this picture.
We will change the Saturation to -100, the Brightness to 80 and the contrast to 100.
On each of our next steps the Saturation and Contrast always gets set to the same position, we will only change the brightness on each picture.

Repeat for each of the remaining 4 pictures.

Now you should have all of your depth layers

Step 7 – Convert each picture to a black and white image
Select the first picture and then click “Bitmaps” and “Convert to Bitmap”

You will want to use the following settings:

Repeat this step for the remaining 4 picture depth layers.
Step 8 – Power Trace Images
Now you should have all 5 of your pictures converted to black and white bitmaps. Right click on your first image and select “Outline Trace” and then “Clipart”

Here is the settings I used in the power trace menu. Just remember, here is another place where you can change setting and adjust to get better results. The more detail your able to trace the better your final image will be.

Repeat this step for the remaining 4 pictures.
Step 9 – Remove White From Graphics
The power trace will create a white part of the image and a black part, we only need the black part of the image. Select your first image and ungroup it. Then select a white area and delete that part.
Repeat this on the remaining 4 images
Step 10 – Create compound of Black Area
Now we want to take the black area of the first image, select “Ungroup All” and then “Arange” and “Combine” (or just “Control” “l”)
This will make the black portion of the first image be one compounded graphic image.
We will repeat this step for the remaining 4 images.
Step 10 – Insert the Linocut Lines
You can create your own line formations by creating wavy lines of increasing line thickness. I’ve included my files here also. The lightest weight lines will be at a 45 degree angle and the thickest weight line will be at 90 degrees. This provides a good crosshatching effect. Just remember this is where you can be very creative and change small things to make this your own creation.
Here’s a picture of my line files.

After inserting the line files you will want to align each one with the correct image.

The thickest line file will go with the image that only shows the darkest parts of the picture. Keep going until the file with the thinnest lines is with the picture that has the most detail to it.
Step 11 – Power Clip the Line Files Into Each Compounded Image
Select the line file for the first picture, then select “Effects” “Powerclip” and “Place Inside Frame”

Now repeat this process for the remaining 4 line files and 4 picture graphics.
After you have all of the line files power clipped inside the graphcs, select all 5 of the graphics and turn their color and outline color to “Blank”. We do not want them to have any color because we only want the lines from the power clip to show up.
Step 12 – Align the 5 Clips
Select all 5 images and type “E” and “C” on your keyboard. This will align each of the object to be “E”ven with each other and “C”entered with each other. (depending on your image this method for aligning may or may not work. It is best to have lineup guides as a part of each of your graphics to make the aligning part of this project be more accurate.
Now enjoy your finished project…

Congratulations you now have a 100% vector, scaleable linotype drawing.
I hope you’ve enjoyed this tutorial. I hope it is easy enough to follow, but feel free to contact me with any questions.
-Keith
[/fusion_text][/fusion_builder_column][/fusion_builder_row][/fusion_builder_container]